Sunday, March 1, 2020

Lets Get Sketchy March Sketch Reveal


Hello Friends,

Wow its March already - time sure does seem to fly by the older we get!

Over at Lets Get Sketchy the March sketch has been revealed, and it is another super one. 

Lots of white space if that is what u=you like :)

My example:

I have used the gorgeous Cocoa Vanilla Studios Happiness collection to scrap these photos from my work Christmas dinner in December 2019.  Although the photos have red and green, I think they go perfectly with the bright happy colours of the collection.

Some close ups:


Thanks for stopping by today, I do hope you find time to enter the challange - cant wait to see what you create with the sketch.

Till next time,
Deb xx


Sunday, February 2, 2020

Off The Rails Scrapbooking February Challenge Reveal

Hello there friends

Have a look at this moodboard from Off the Rails Scrapbooking Facebook Group:

Image may contain: one or more people, sky and outdoor

Welcome to the FEBRUARY CHALLENGE - this challenge is all about TIMES OF TRIAL, share your ideas for your chance to win a fabulous prize from Carol Theng of Carol's Paperie'
Please add your entries to the February Challenge Album which can be found by going to photos then albums.
We look forward to seeing how you all interpret this month's challenge.

The link to the Facebook page where the challenge is held:

https://www.facebook.com/groups/218271898365820/

and my example:

I started an art journal spread using the colours of the moodboard but I started thinking about the loss of lives, property and animals in the Australian fires and came across the image whilst browsing the web. It was too raw not to use.

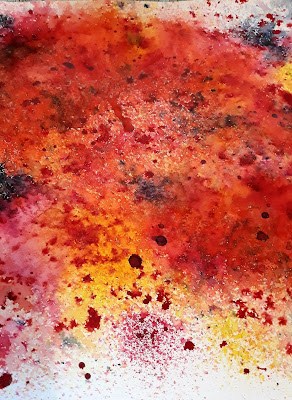
I took a sheet of Kaisercraft Smooth white cardstock and some Lindys Stamp Gang magicals and Colour Blast Colour Shimmer Dust.  Using a palette knife, I sprinkled the powders onto the cardstock and then spritzed with water to spread the colours. 


 I added more colour and more water where necessary to give me a background that resembled the fire pictures.

I then took some Dylusions Ink Spray in Postbox Red and splattered it over the dried background
Next came the stencilling.  Originally I was going to use the whole stencil as a sunburst, but decided to only use the outer bits.  Using Paper Artsy Fresco Finish paints, my absolute favourite paints in the whole wide world, and a piece of cut-n-dry foam, I stencilled in variuos colours, trying to make it look like sparks from the fire.


I love how this turned out.  It is really effective.
I took my photo and triple matted it, tearing the edges of the bottom mat, to again mimic the fire.

I added some Scrapmatts Hexagon chipboard mesh behind the photo to ift it a bit from the background, then added a Scrapwords from set 21, outlining the 'Remember' in white gel pen to make it stand out.

To finish the layout, I used black thickers - Hardcover to create the title which is the first line from a very famous Australian poem by Dorothea Mackellar and which is very apt at the moment, espcially when the 'sun' in sunburnt is parenthesised leaving the word 'burnt'.

In all I am very happy with how this layout turned out and I hope that you can find time thhis February to participate in the challenge.


Thanks for stopping by

Till next time
Deb xx


Wednesday, January 1, 2020

Lets Get Sketchy January Reveal


Happy New Year friends

Gee, its 2020 already. 

I do hope you all ad a very merry and bright Christmas and your new year will e happy and safe.  I am looking forward to the year ahead.

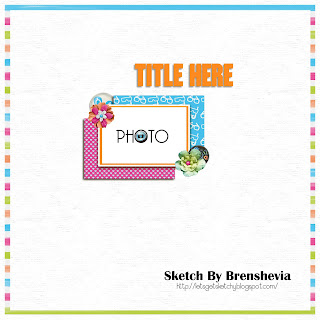
The January sketch is up at Lets get Sketchy, and boy is this a great one for those of us who love lots of white space and minimal embellishments :)  Aren't Brenshevia's sketches just the best?


And my example:


Like I said, lots of white space - clean and simple!!

Thanks for dropping by today, hope to see you soon

Till next time

Deb xx


Wednesday, November 27, 2019

Sketches in Thyme Week 4

Hello friends

I am a few days late with my Sketches in Thyme reveal for the November week 4 sketch.  Oops, sorry :(

So without further delay here it is:


There is so much you can do with this design.


Our fabulous sponsor this month is DT Bev Code with this
super Echo Park Collection.


And here is my effort :)

 Be sure to enter your link to the inlinkz for this or any of this month's sketches in the sidebar 
by November 30, 2019 for your chance to win,
and so we can visit and leave comments.

There is still plenty of time to enter

Till next time, take care

Deb xx


Off the Rails November Challenge


Hello there friends

Long time no see :(  Things have been very hectic for me of recent times and scrapping had to take a back seat until I had it all sorted - it is now!!

The November challenge at Off the Rails Facebook group is a beautiful one:  Boho.  All very foreign to me, but I had a go anyway to show that you can take a challenge and achieve something that you will love :)

Just look at those gorgeous colours :)

No photo description available.


I decided to do an art journal page in my small Dylusions journal using Paper Artsy products - Fresco paints and Tracy Scott stencils and stamps.  (by the way I have an addiction to all things Paper Artsy - especially Tracy Scott stamps and stencils)

I started by gathering my supplies, and laid down a base of pastel colours - Mermaid, Guacamole, Peach Nectar and Rose.  I then took Tracy's stencil PS111 and used a baby wipe to wipe of some of the colour.  I did each colour at a time and dried between each lift.


Next I took Tracy stencil PS160 and using the same paint colours, I applied the paint through the geometric designs


After I was happy with the stencilled layers, I took a Kaisercraft stamp from the Gypsy Rose set and created a large circle in the centre of the pages
This stamp is a semi circle, so I just stamped it back to back with black archival ink.
Next I took the face from Tracy's ETS17 stamp set, inked it up, very gingerly laid it on my page and pressed it down

Then to decide what to do with the stamp - leave it as it is or colour it.  I have never coloured a stamp before, let alone a face so I stamped the image again onto a plain piece of paper and took my Fresco paint in Chalk, and a very fine paintbrush, and had a go!!  It turned out beautifully, if I must say so myself, so I bit the bullet and painted the face.
I had coloured the eyes and lips in my practice image but decided that I liked the patterns showing through so left those as is.

 I used a Kinder Kreations feather stencil and black paint to create a dreamcatcher with the circle stamp.  

After this had dried, I I finished off with some stamping in black ink and white paint using the flower stamp from the face images set (ETS17) and a small scribble flower from the JOFY76 set.  I also used a scribble stamp and JOFY small alphabet stamp, and a small co-joined diamond pattern stamp from the Kaisercraft set.

To finish off I added more white with a gel pen, drawing over the feathers of the dreamcatcher and filling in some of the diamonds on the stamp, and finishing off with a gold Posca pen detail on the flowers.  I used the quote from the Gypsy Rose set for a title.


If you have got this far, I thank you :)

Let me know what you think

Till next time
Deb xx


Friday, September 27, 2019

Off the Rails September Challenge

Hello Friends

Septembers challenge at Off the Rails Scrapbooking Facebook Group is been all about colour!

Follow the link to join in - you wont be disappointed.

No photo description available.
Now show us your COLOUR, we want vibrate, sassy, loud, BRIGHT, in your face colour..

I think I followed the brief :)


I have a tutorial on how created this layout

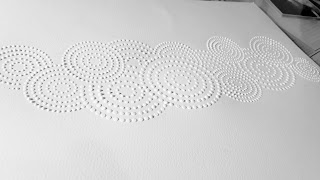
I used a sheet of Kaisercraft Premium White cardstock as the base and a Michelle Grant for Colour Blast Australia A4 stencil with white texture paste.  I placed this across the page about 1/3 down.


I then delved into my stash of powders and chose the brightest colours I could to colour the dotted circles and create drips


I mixed the powders with water and painted, and dripped each circle, and then dried it before moving onto the next one


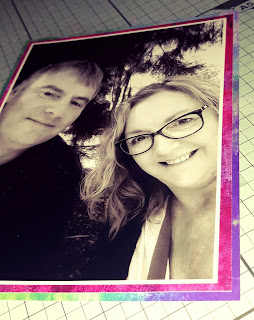
Whilst waiting for the last circle to dry, I double matted my black and white photo with 2 sheets of the Natalie May designed paper from Paper Roses, Arty Love Collection.  These A5 sized sheets of 210gsm card have a satin finish and are totally gorgeous. I then mounted the stack onto foam to take it off the background.
Before I adhered the photo, I took an array of ink sprays to match the background colours and generously splattered all over the background

When I had finished and all was dry, I adhered my photo and took a mix of Simple Stories alphas and Dear Lizzy thickers to create my title - nothing else required.


I really love how this turned out, and hope you do to!


Thanks for stopping by today - would love to see what you create in the next few days to be eligible to win our great prize.

See you soon
Deb xx